I used to make candy cakes: Styrofoam cakes with candy hot glued to the outside. The candy simply pulls off the styrofoam and you take off the wrapper and enjoy. My Barbie Candy Cake is by far the most popular thing I’ve posted on Pinterest. It’s a cake with a REAL BARBIE DOLL INSIDE. No weird disembodied torso, OH NO. THE REAL DEAL. Here she is, in all her purple glory:

Pretty neat, yes? The advantage of creating these cakes at the candy store was that there was professional equipment at our disposal, like a heated styrofoam cutter, and literally hundreds of sizes and shapes of candy. While you don’t have an entire candy store at the ready, this Barbie candy cake IS possible to make in your own home. And hey – I needed a birthday present, so now is just as good a time as any to make the tutorial.

I will say that the equipment makes or breaks the “doability” of this project.
Supplies:
- Hot glue gun
- Hot glue
- A hot styrofoam cutter OR serrated knife (a bread knife is cool)
- A vacuum
- A drill with spades*
*This is to drill the hole Barbie will go in. If you don’t have a drill you’re going to end up just hacking away a hole in the middle of the styrofoam so Barbie can go inside. Is this easy or safe? Not terribly. The wiser investment might be plunking down a 20 at Michaels for that hot styrofoam cutter.
Shopping List:
- Anything from the above list you don’t have
- (2) 8” Cake Dummies (they will be 4″ tall)
- 1 9” Cake Round (Cardboard Circle)
- Tissue Paper (to cover the cake round, so maybe in a coordinating color)
- A chunk of cardstock 4”x8” (we literally used a chunk of a cereal box)
- A Barbie, with a short skirt or bathing suit outfit
- A giant pile of candy in your color scheme
Lets discuss the shopping list. The cake dummies are just round styrofoam chunks. Cake decorators use them for practice. You will use them to create the dress. They, and your cake round, can be purchased from any cake decoration store. Support a small business; shop at a local one!
As for the candy, I’d get a color theme in mind. Match it with your Barbie. My Barbie and candy was from around Valentine’s, so that’s why we’re working with a lot of red and pink. You want to make sure you’re picking things that will glue on easily. Anything like a Tootsie Roll isn’t ideal because the hot glue and the wax wrapper aren’t friends. It will just fall off. I love Air Heads candy because they’re a. delicious and b. get good coverage. Laffy Taffy in all it’s wonderful shapes and sizes is also a plus. The purple Barbie has a fan in the back of her dress made of a lollipop with more candy glued to it. My red Barbie just had a few small lollipops in the back. I like the tiny pops because they help fill weird holes and sometimes you can use the sticks for gluing (more on this below).
When thinking of where you can buy the candy, I’d look to local candy stores and bulk food shops first. I made the mistake of trying a Party City first. I went to three before giving up on them. A lesson in taking my own advice. Shop local!
A note: Please keep your kids in mind when picking candy. Allergies are always a concern and sometimes tiny candy is a choking hazard. Be mindful, be safe. Okay, you have a pile of tools! Lets GET TO WORK.
MAKING THE BARBIE CANDY CAKE:

1. Glue the two cake dummies together using hot glue, one on top of the other. You don’t need to hot glue the thing to death, just enough to create a solid bond, so you have a cylinder that is 8″ tall and 8″ across. While the glue cools…
2. Mark center on both the top and the bottom. That’s 4” in. At this point you’ll pick out your wide spade for the drill or if using a foam cutter, measure a 2” circle to be your guide for cutting out the middle so Barbie can fit. Barbie has booty.
3. Oh yeah, secure Barbie’s skirt, if she has one. I used the rubber bands from her packaging.
4. Get your vacuum ready and drill/cut your hole, working from the top and bottom so you meet in the middle. Our spade was 1.5”, so we wiggled it around a little. Styrofoam will fly and stick to everything because of static electricity and science. The vacuum will keep you from going crazy trying to clean up. The hot cutter will be cleaner and might not need the vacuum. If the edge is rough, that’s okay. You’ll cover it with candy.

Look! Barbie has a very couture minimalist wedding dress now. It’s a statement about the wedding industrial complex. She’s writing her thesis on it.
5. Take Barbie out and grab your cardstock. This is going to be a guide for the slope of your dress curve. Draw on the cardboard approximately what you want your curve to look like. Cut on the inside of the curve. This will give you your guide. You can see it below in the action shot of us cutting down the foam.


6. Take your bread knife or foam cutting knife and start shaving chunks away. Use the guide and check your progress, by holding it up to your cake. This will help you keep a consistent curve. Otherwise her dress might be weird and lumpy. Again, being exact isn’t 100% necessary because you are covering it with candy. I made a gif of that cutting action for you.
Another note: for the love of all candy, please be careful cutting and drilling and gluing this all together. There are so many exciting ways you can hurt yourself working on this. Take your time and be cautious. I will say it is most likely you’ll burn yourself with the hot glue gun. I’ve done it myself. Careful. Please. Thank you.
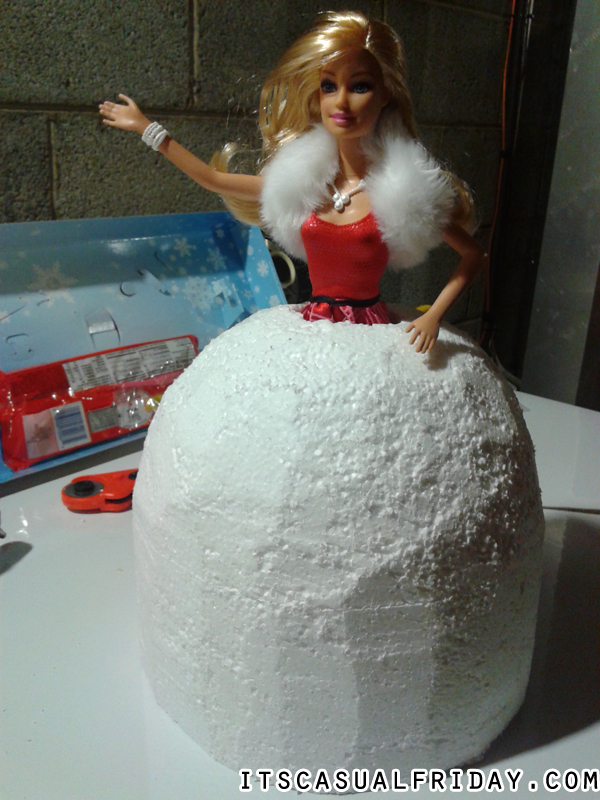
7. After cutting away the sides, do a height check. We found that Barbie’s hips were at about 7.5” so we cut a final half inch slice off the bottom.
Ooo dang it’s looking like a dress now!
8. Now we assess our candy situation and think about how to design our dress. I completely just make up a dress. I use bigger candy as poofs and try to make layers. The nice thing about the hot glue is if it sucks, you can rip it off and start over. So play around. I like to use the rope Laffy Taffy to define my poofs. The two tone thing (like the purple Barbie) takes more design savvy to pull off, but I think it looks really cool.

When looking at coverage, I’ll sometimes lay out my candy so I can see how I’m doing. You want to make the front and sides as symmetrical as you can. It looks crummy if it isn’t. The back is the back, so it’s kind of fair game to kind of have it a little messy. But for the front and sides? Yeah. Matchy matchy. It also helps, I think, to establish a pattern.
9. Start slapping glue on there. Apply some, not a lot, of glue to your candy. Press it to the foam and hold for maybe 5 seconds.

Sometimes you end up with weird little holes peaking out inbetween your candy. My recommendation is to take some of that tissue paper and dab a little glue on it. Use a lollipop stick to poke it inbetween you candy to cover up the styrofoam. Honestly, you’ll see the gaps and no one else will, but this is a cheap and easy fix. You could also use small candy like the Jolly Rancher. My finished dress also has zots turned on their sides glued in. I think it make it look like little bow/tufts on the side.
10. Once you’ve filled in all your gaps, your dress is complete! Give it a once over and see if anything is loose. A little extra gluing won’t hurt, especially if it needs to travel somewhere else. Once this is done, take the cake round, hot glue the tissue paper to it, and glue it to the bottom of the dress, tissue paper color side up. Make sure you leave the center 2″ free of glue so Barbie’s shoes don’t get glued down. This is your base.
That’s it! At this point, you have a finished Barbie cake! Ta da! You did it!

Once the candy is devoured, Barbie can be slipped out and played with separately and the cake (if not too beat up) might live to be another dress. Play around, see what kind of color patterns you like and most importantly – HAVE BACKUP CANDY. You might get hungry while you work. It’s part of the design process. Happy crafting!

